Pastel de Nata
There’s nothing quite like the smell of freshly baked Pastel de Nata — the sweet, toasty aroma of butter and caramelized custard that instantly fills the kitchen. This recipe captures everything I love about the traditional Portuguese tart, but with a few small adjustments so anyone can make them at home using a regular muffin tin. The pastry is flaky, the custard is rich with a touch of lemon and cinnamon, and each tart finishes with those signature burnished spots that make them unmistakably authentic.
Want a smaller batch? Try our Half-Batch Pastel de Nata.

Ingredients
The Dough
Laila’s Tip: Use a kitchen scale! Measuring in grams gives a more exact outcome and helps your pastry bake evenly.
| Ingredient | Imperial | Metric |
|---|---|---|
| All-Purpose Flour | 2 ⅔ Cups | 320 g |
| Ice Water | 1 Cup | 240g |
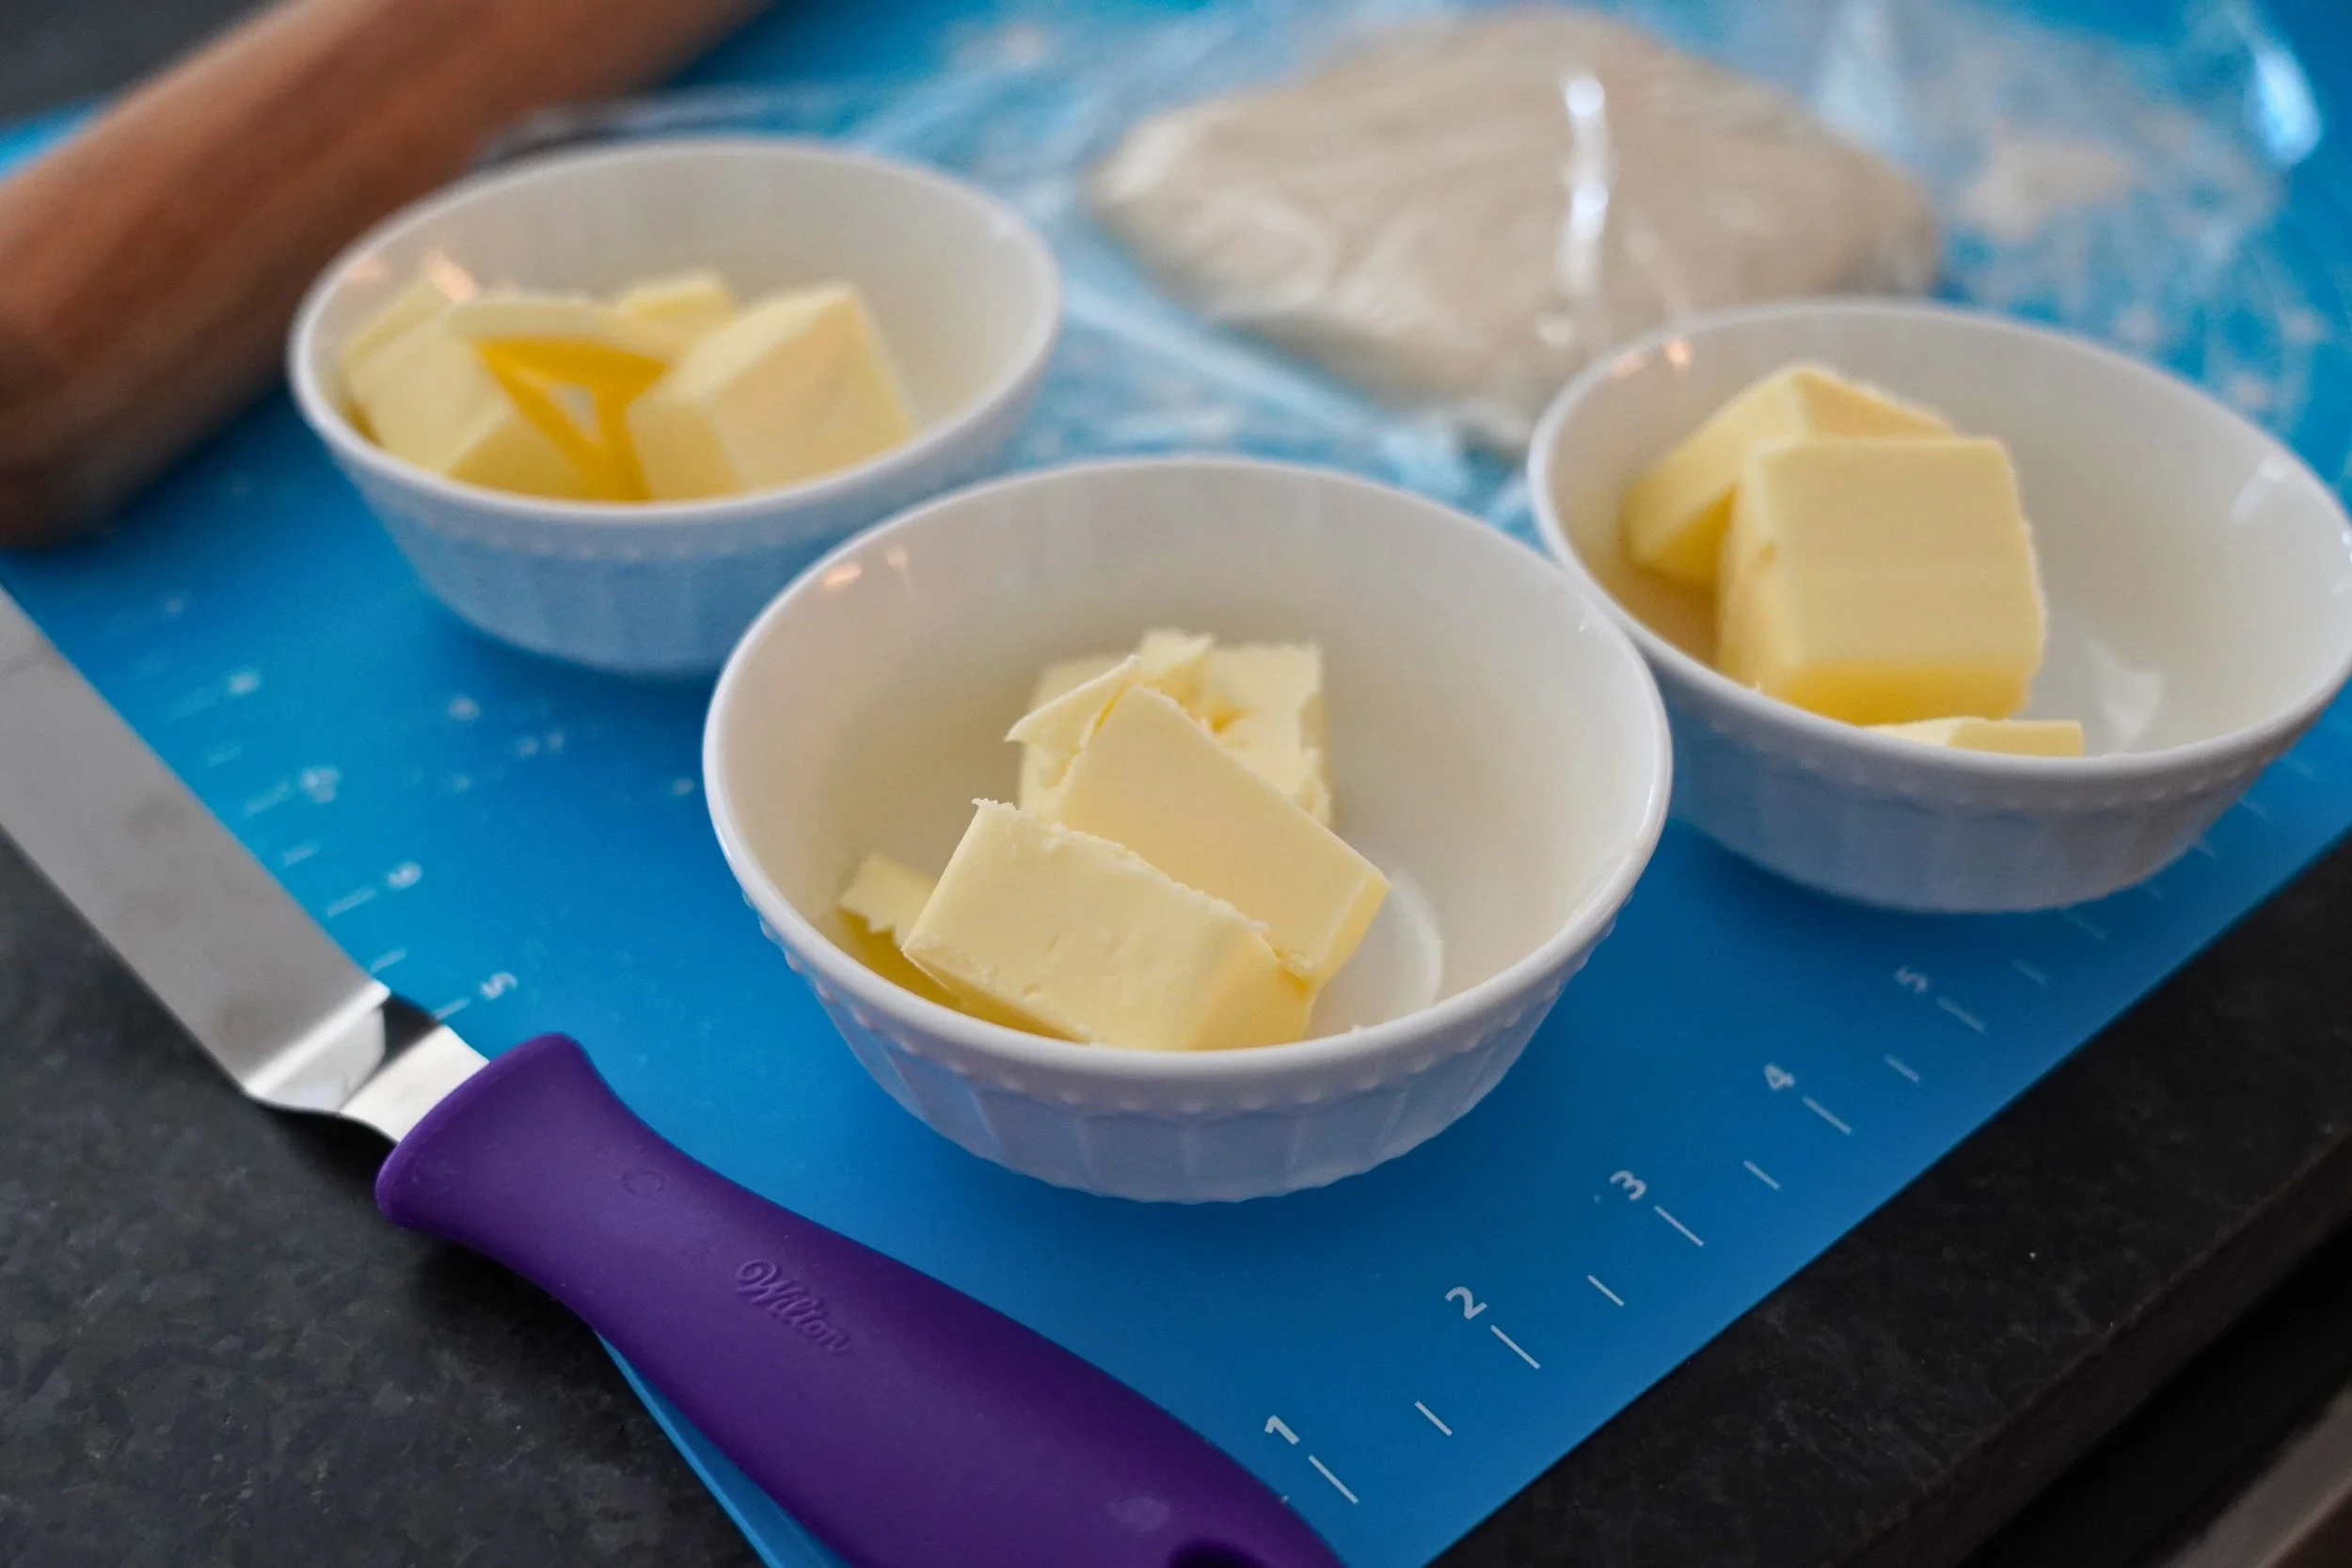
| European Butter, Salted (🔗 buy it!) | 1 Cup + 2 Tbsp | 260 g |
The Custard
| Ingredient | Imperial | Metric |
|---|---|---|
| All-Purpose Flour | 5 ½ Tbsp | 43 g |
| Whole Milk (separated in 2 parts) | 2 Cups (⅓ Cup & 1 ½ Cups) | 490 g (100 g & 390 g) |
| Salt | Pinch | Pinch |
| Granulated Sugar | 1 ½ Cups | 315 g |
| Water | ¾ Cup + 2 tsp | 205 g |
| Cinnamon Stick | 1 Stick | 1 Stick |
| Lemon Zest Peel | Half a Large Lemon | Half a Large Lemon |
| Vanilla Extract | ¾ tsp | ¾ tsp |
| Egg Yolks (beaten) | 8 Yolks | 8 Yolks |
Recipe
The Dough
Mix the dough
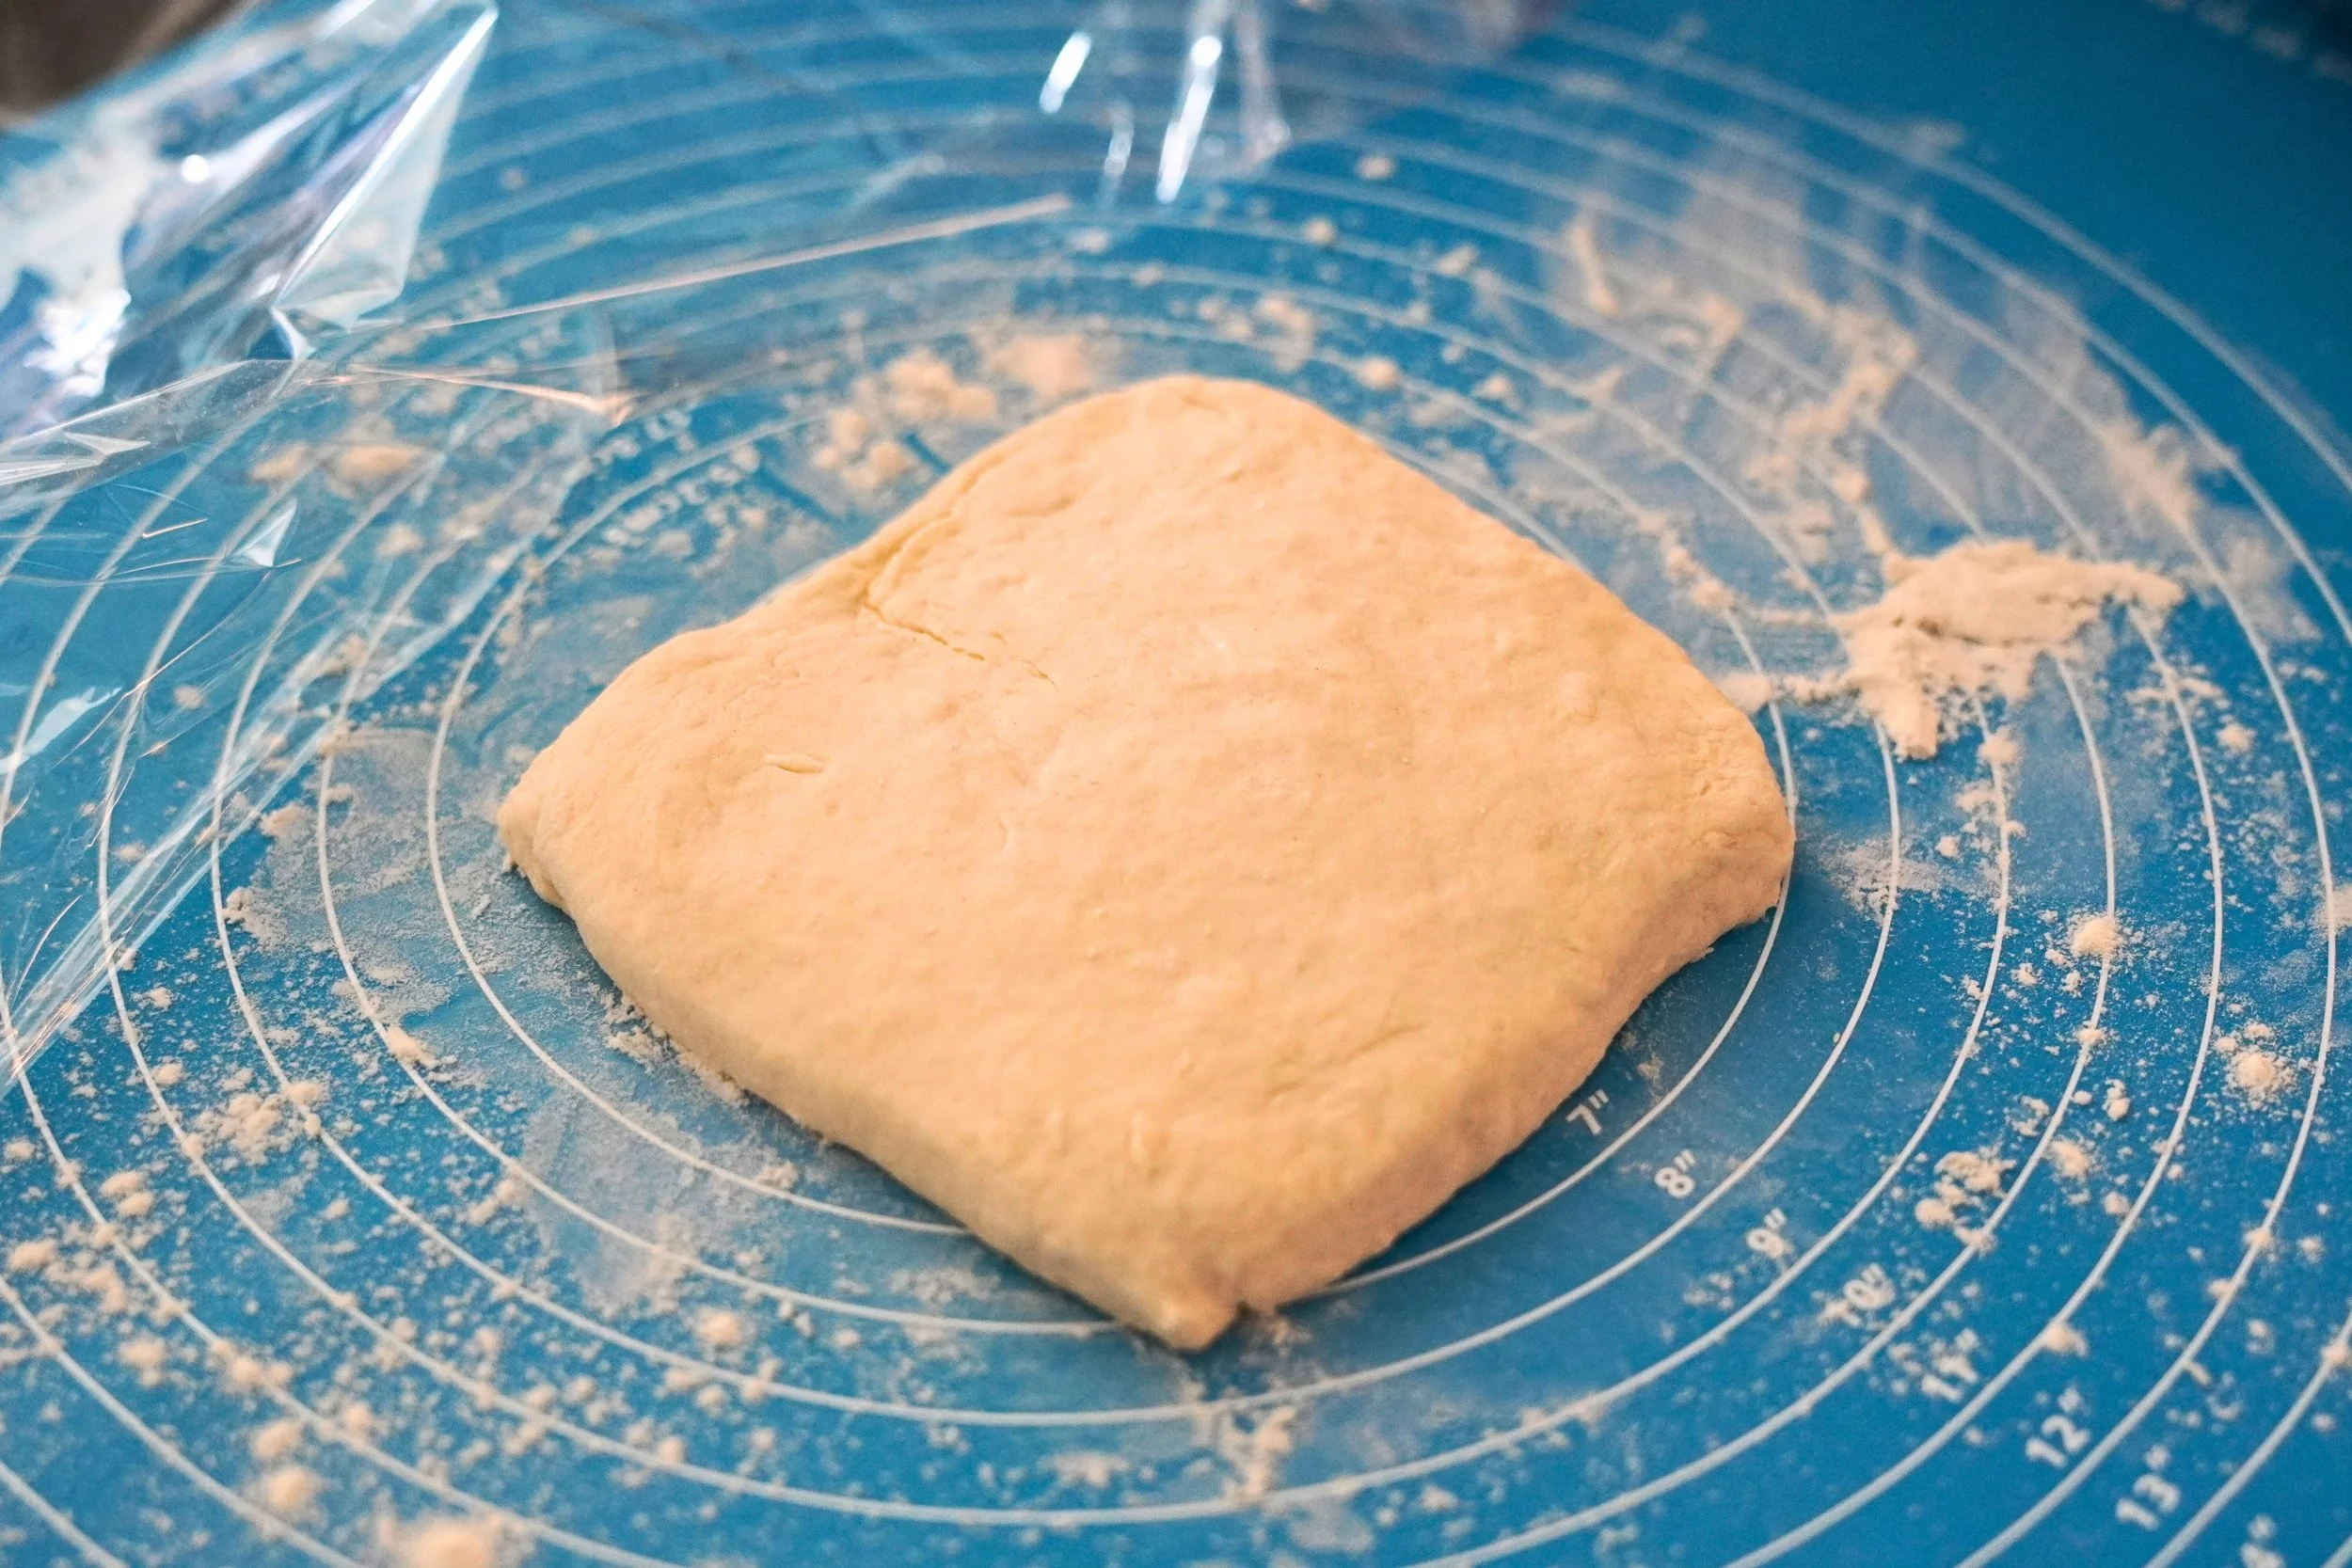
In a stand mixer fitted with a dough hook, combine the flour and water. Mix on low to medium speed for 1–2 minutes, or until a smooth, pillowy dough forms. Texture should feel slightly sticky but cohesive.Rest
Turn the dough out onto a lightly floured surface. Shape into a square, dust lightly with flour, cover with plastic wrap, and let it rest at room temperature for 15 minutes.Roll out
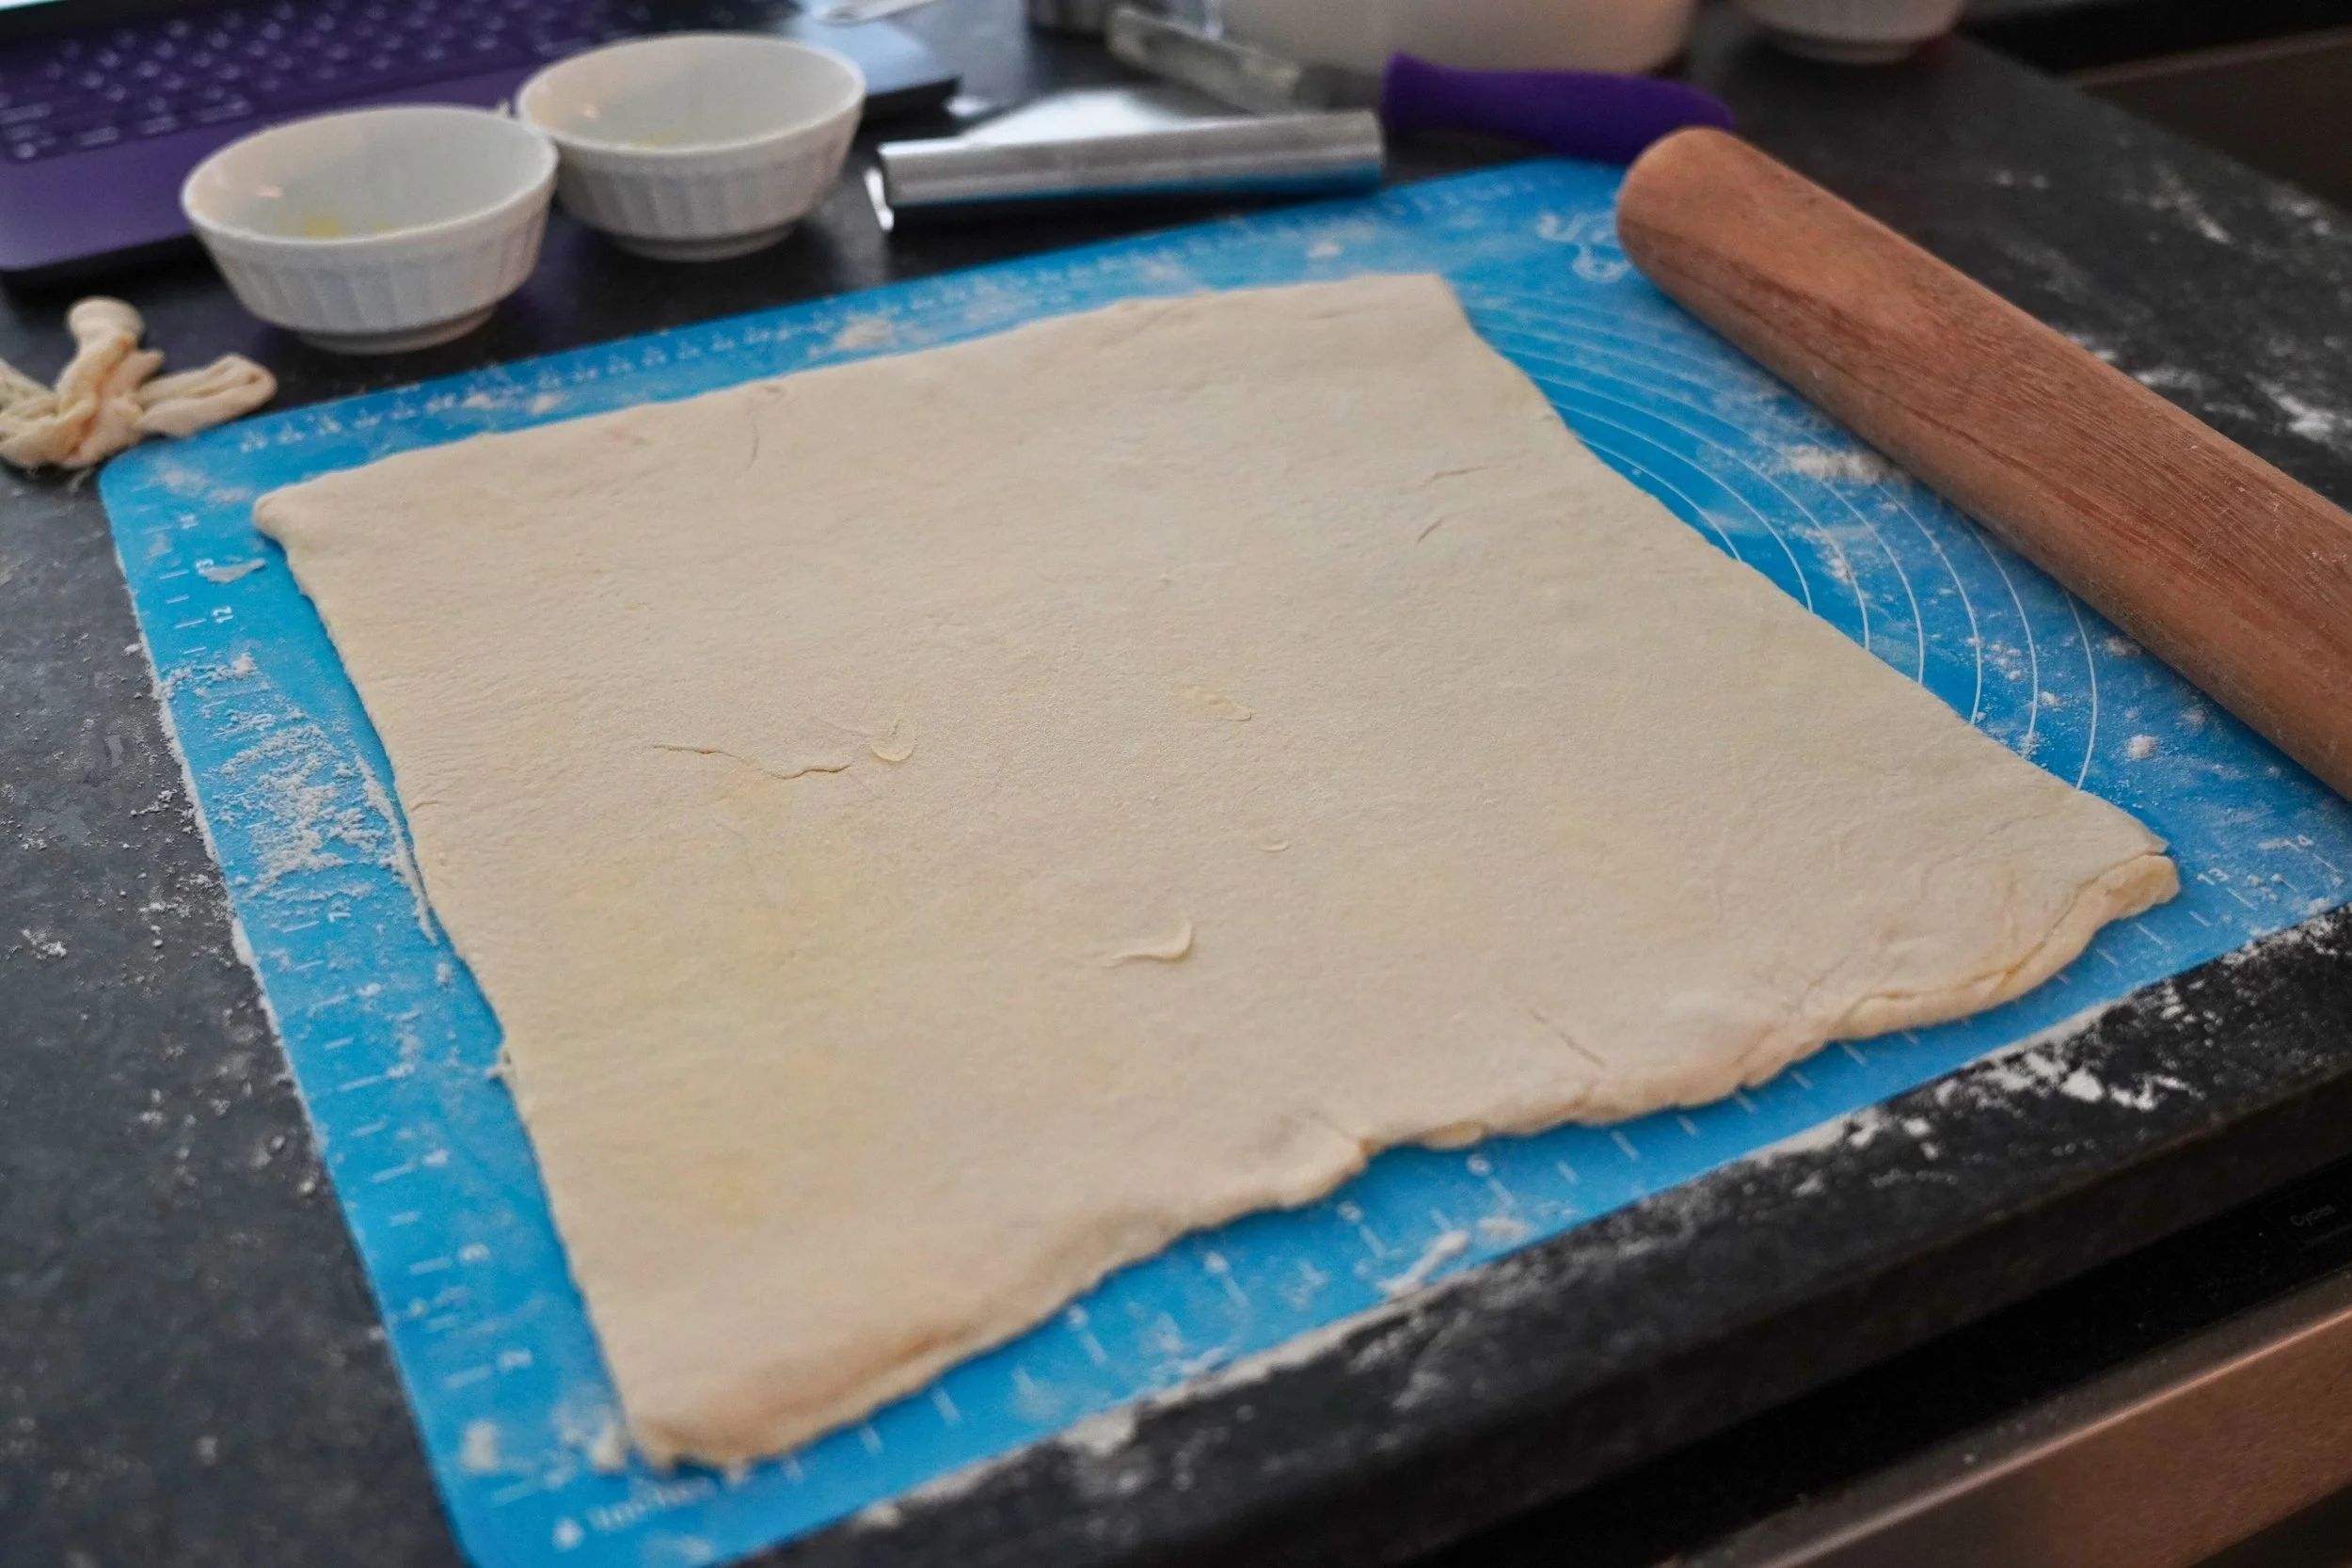
Uncover and roll into a 18 in (45 cm) square.Laila’s Tip: Lightly dust under the dough as you roll to prevent sticking.
Laila’s Tip: Trim edges to keep the square neat — it helps the folds and layers stay even later.First butter layer
Using an offset spatula, spread ⅓ (about 86 g) of the butter onto the left ⅔ of the dough, leaving a 1 in (2.5 cm) border unbuttered around the edges.Letter fold
With the unbuttered section on your right, fold the dough in thirds:Lift the unbuttered section and fold it over the middle.
Then fold the left buttered section over that.
Press gently to seal the edges.
Rotate and repeat
Rotate the dough 90°, with the folded edge facing you. Roll back into a 18 in (45 cm) square and repeat Steps 4–5.Final butter layer and roll
Rotate again so the folded edge faces you. Roll into a 18 × 20 in (45 × 50 cm) rectangle, with a short side facing you.Spread the remaining butter evenly across the surface, including the edges.
Starting from the side closest to you, tightly roll into a log. Brush off any excess flour and trim the ends.
Chill
Cut the log in half, wrap each piece tightly in plastic, and refrigerate for at least 2 hours.
The Custard
Prep
Set a fine-mesh sieve over a large heatproof bowl.Flour base
In another large heatproof bowl, whisk together the flour, 100g (⅓ cup) of milk, and salt until smooth.Sugar syrup
In a saucepan, combine the sugar, water, cinnamon stick, and lemon peel.
Cook over medium-high heat until the mixture reaches 220°F (104°C).
Do not stir while heating. Remove from heat and set aside.Heat milk
In a separate saucepan, bring the remaining 390g (1½ cups) of milk just to a simmer.
Gradually whisk the hot milk into the flour mixture until smooth.Combine
Remove the lemon and cinnamon from the syrup.
While whisking constantly, slowly stream the syrup into the flour-milk mixture.Add flavor
Whisk in the vanilla extract.Add yolks
When the mixture feels very warm but not hot, whisk in the egg yolks until fully combined.Strain and cool
Pour the custard through the sieve into the prepared bowl.
Cover with plastic wrap (pressing it directly against the surface) and let cool to room temperature.
Assembly
Prep
Position your oven rack in the middle section.
If using a tabletop oven, use the lowest rack instead.
Preheat to 480°F (250°C) — do not use convection.
Grease a standard muffin pan and set aside.Roll dough log
Remove one dough log from the fridge and let it rest at room temperature for 8 minutes while the oven heats.
On a lightly floured surface, roll it into a 14 in (40 cm) long, 1 in (2.5 cm) thick log.Laila’s Note: Trim the ends if they’re uneven or butter-heavy.
Cut and shape
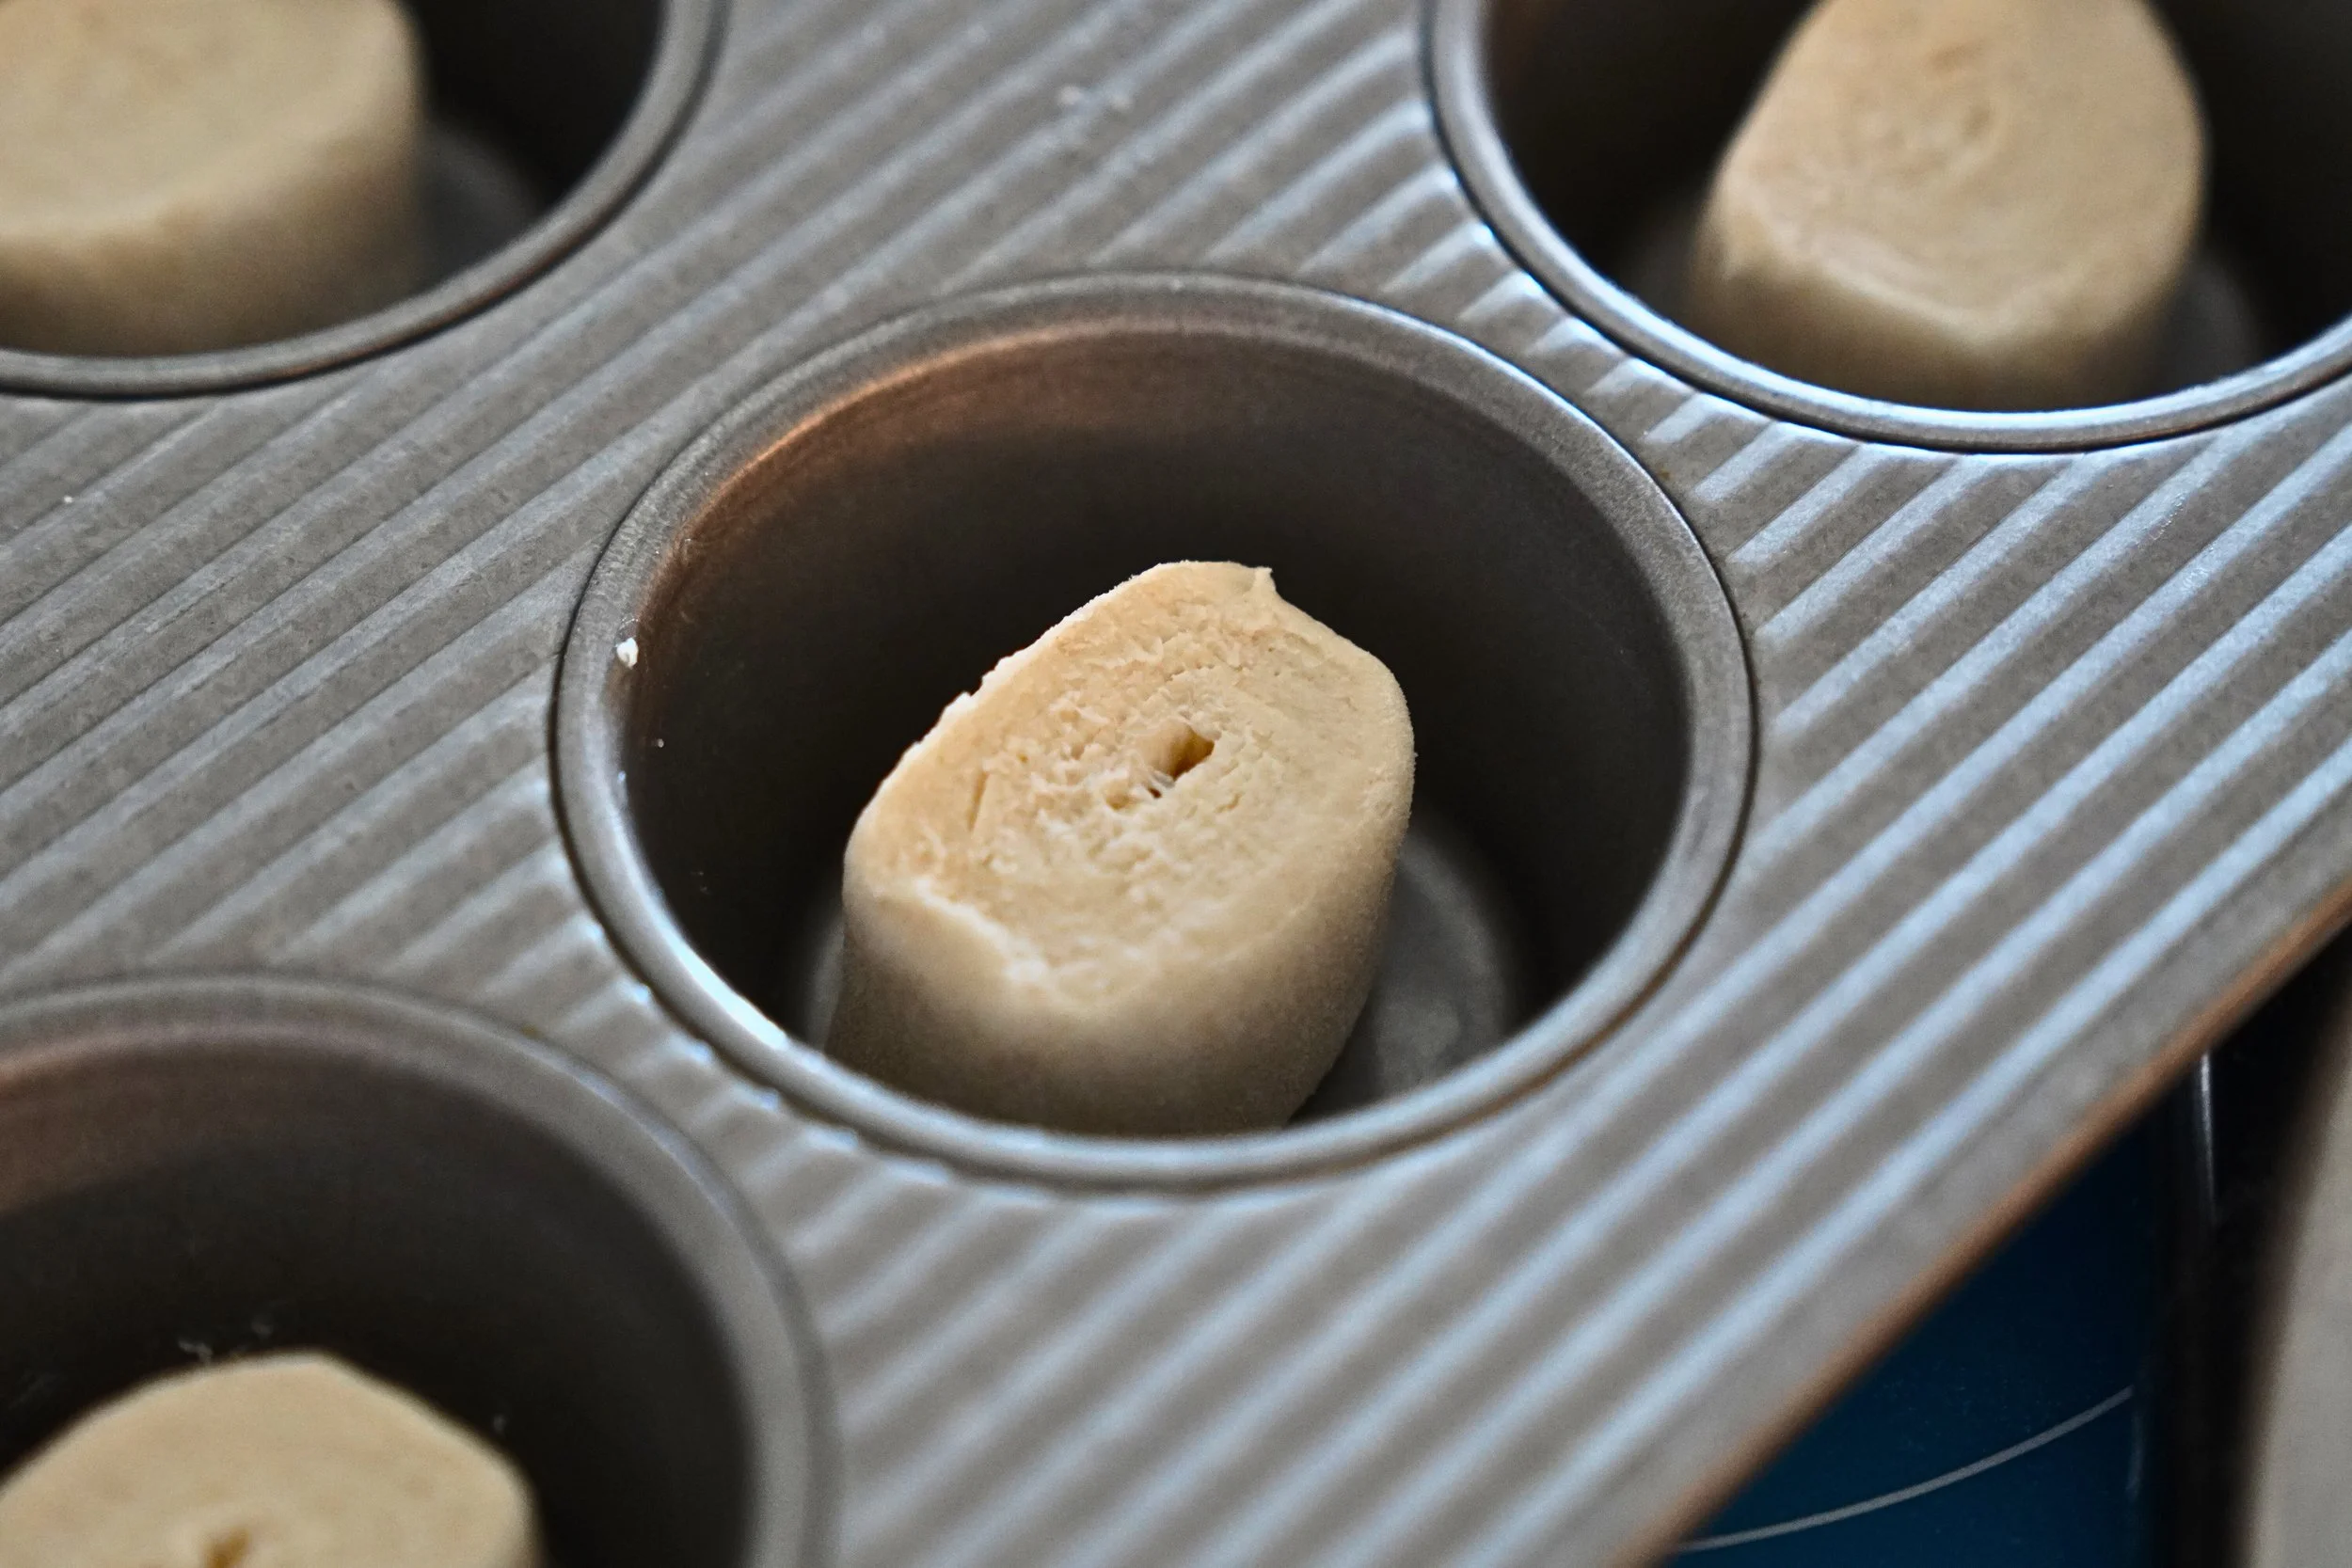
Cut into 1 in (2.5 cm) discs and place each one into a muffin cup (12 total).
Dip your thumbs in water, press into the center of each disc, and gently spread outward in a circular motion to form a cup.Aim for 1/16 in (1.5 mm) thick bottoms and a ⅛ in (3 mm) raised lip.
Laila’s Tip: Be careful not to puncture the dough — the bottom should be thin but intact.
Fill
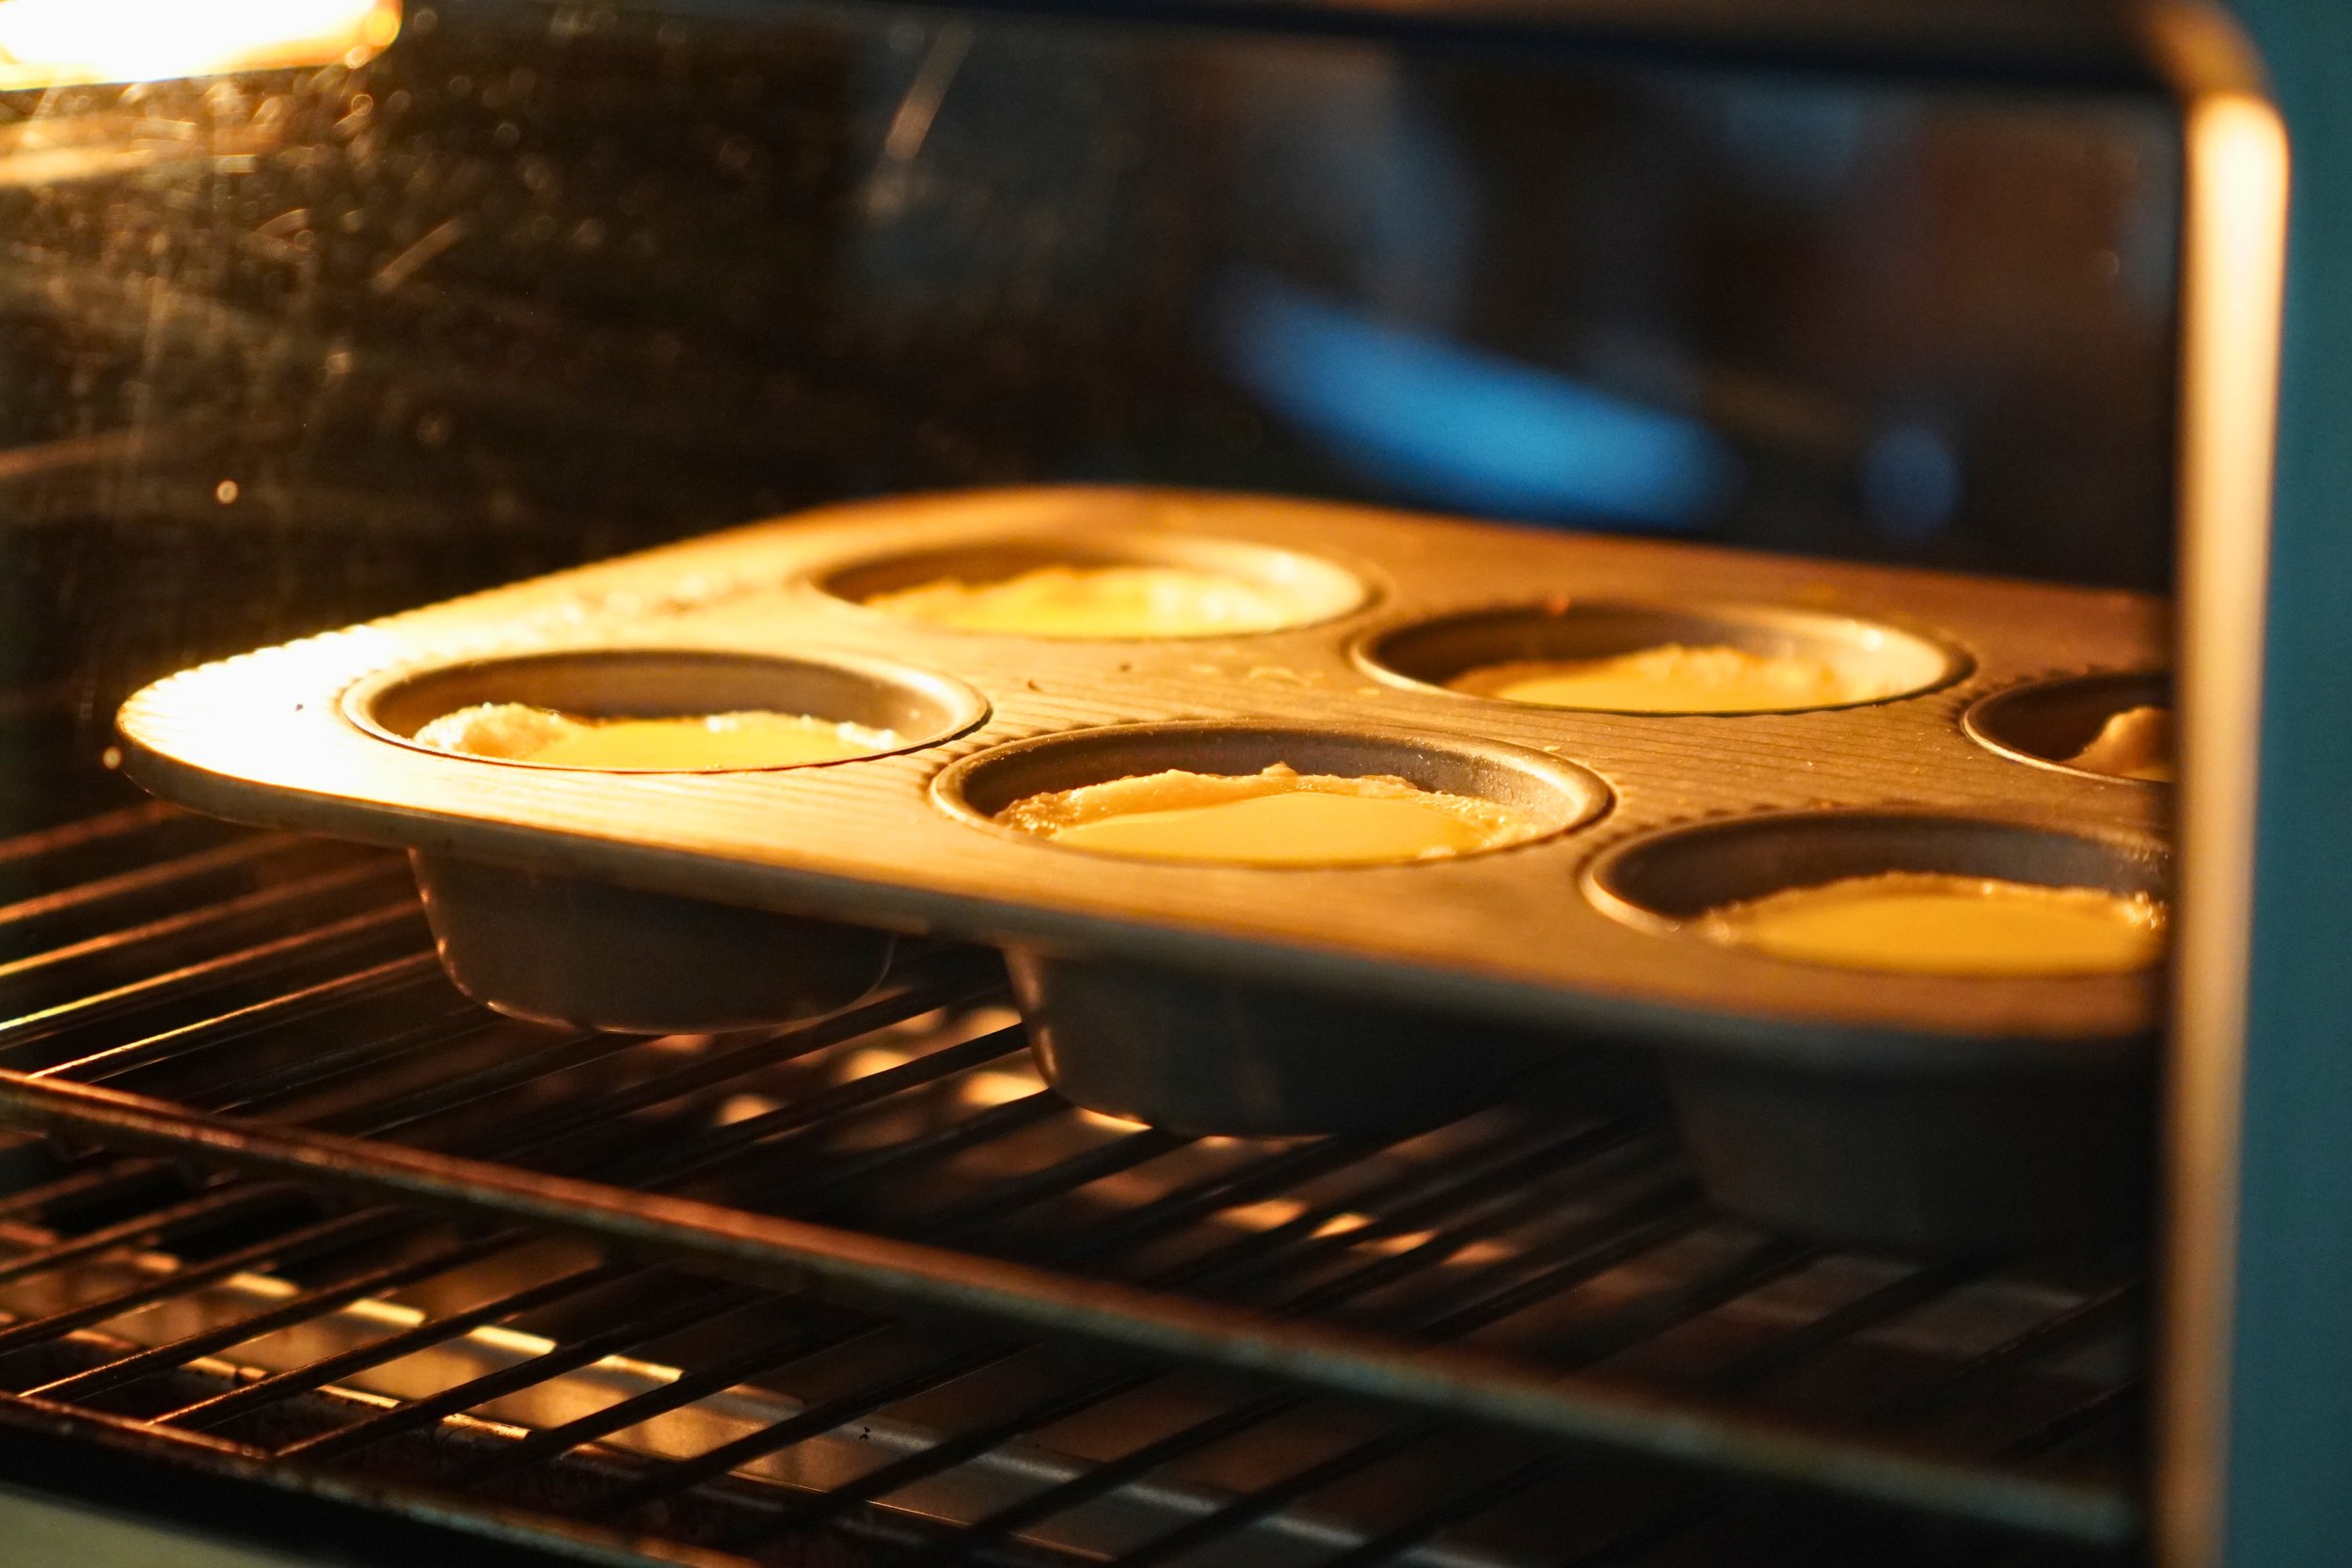
Pour the cooled custard into a measuring cup or spouted pitcher and fill each pastry ¾ full.Bake
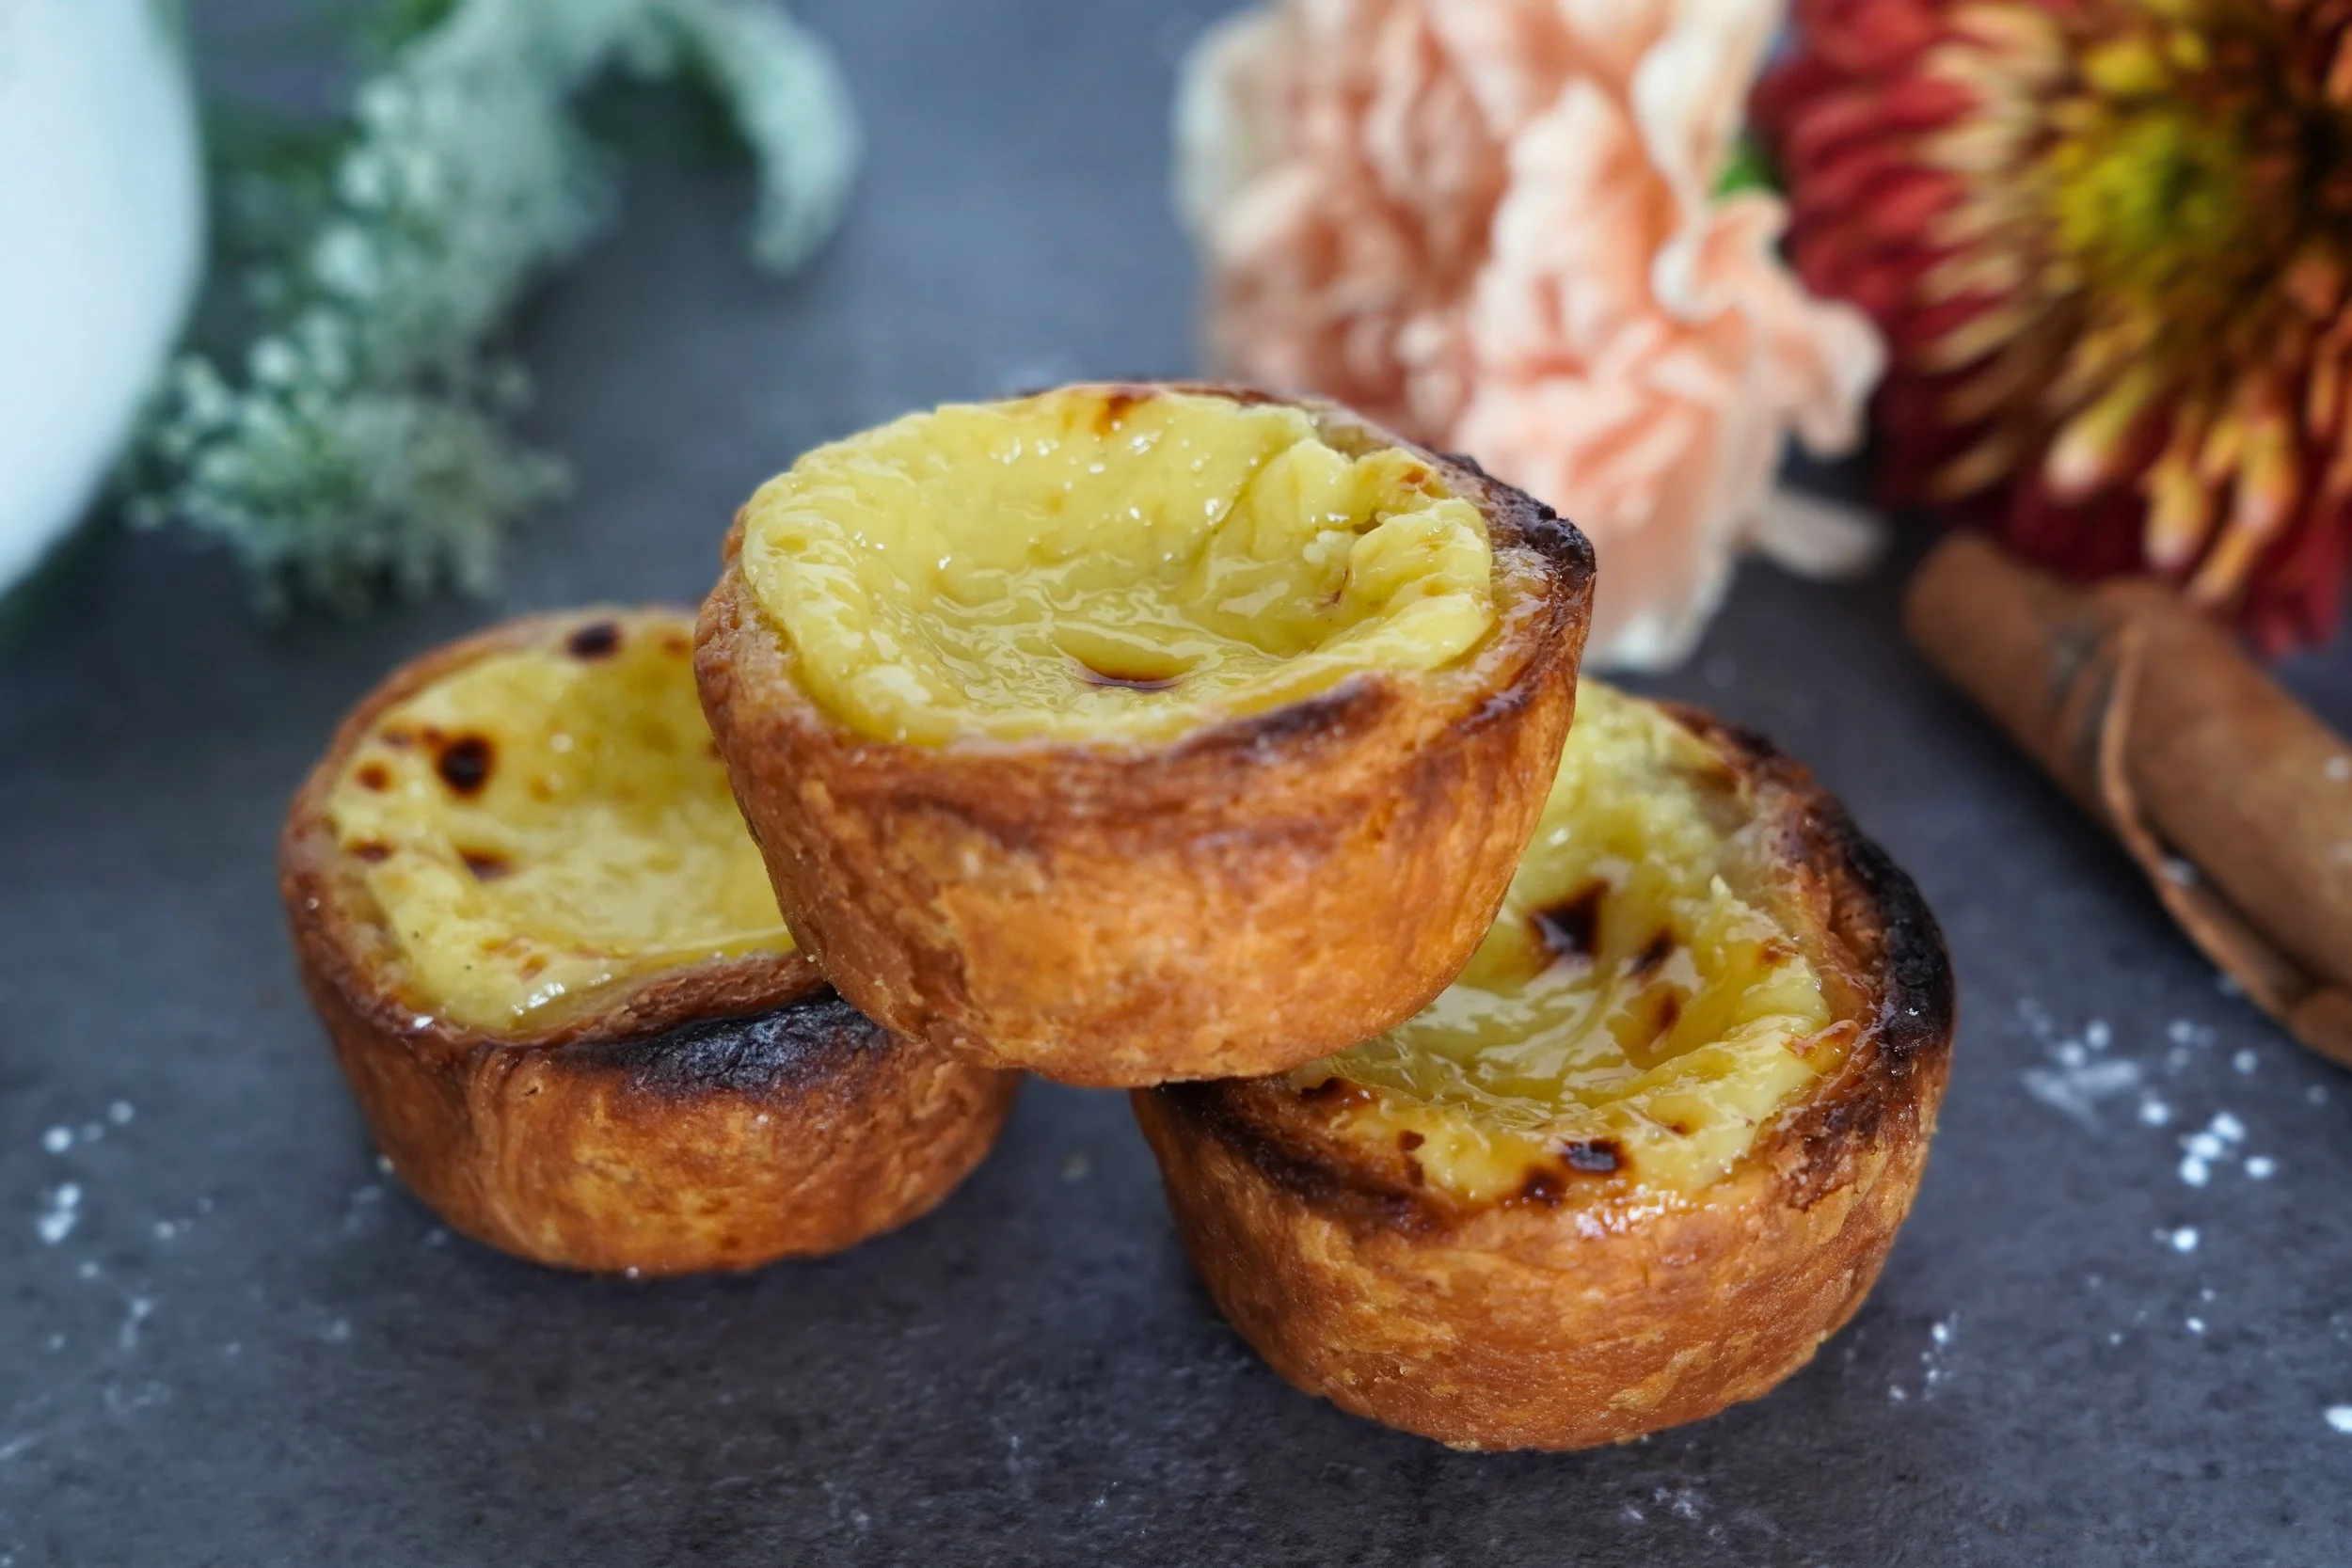
Bake for 13–14 minutes, or until the edges are golden and the custard is just set.
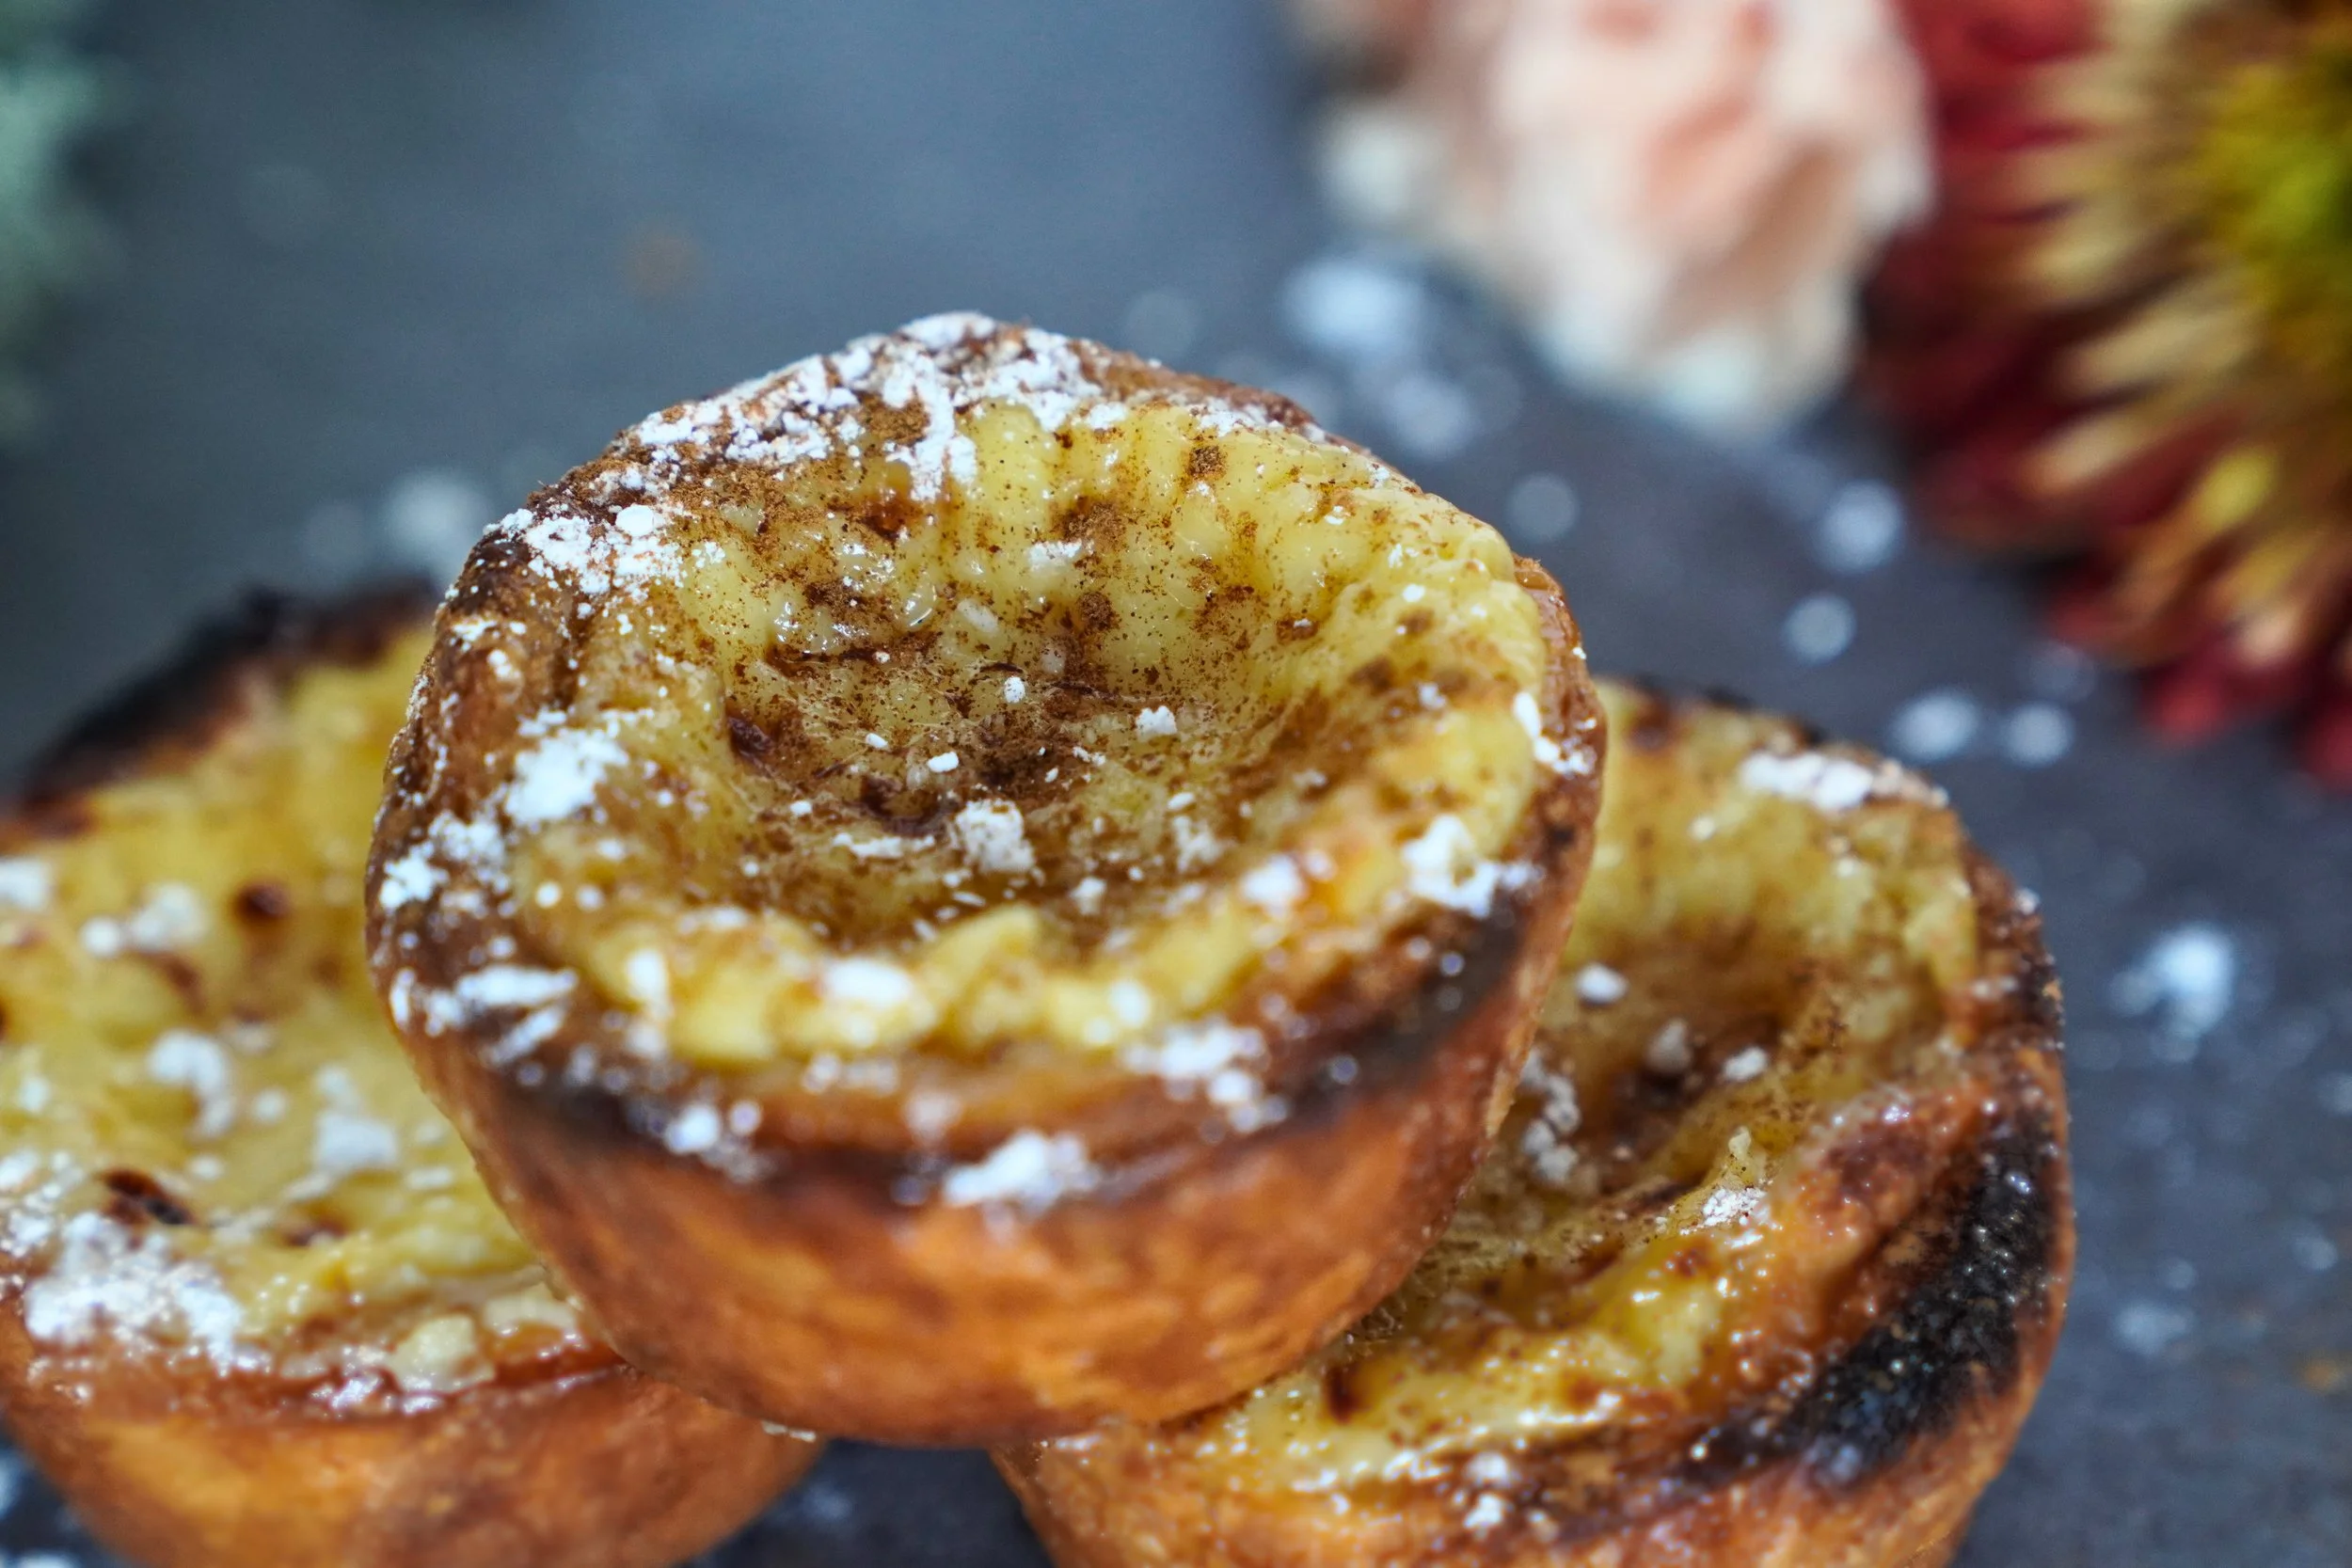
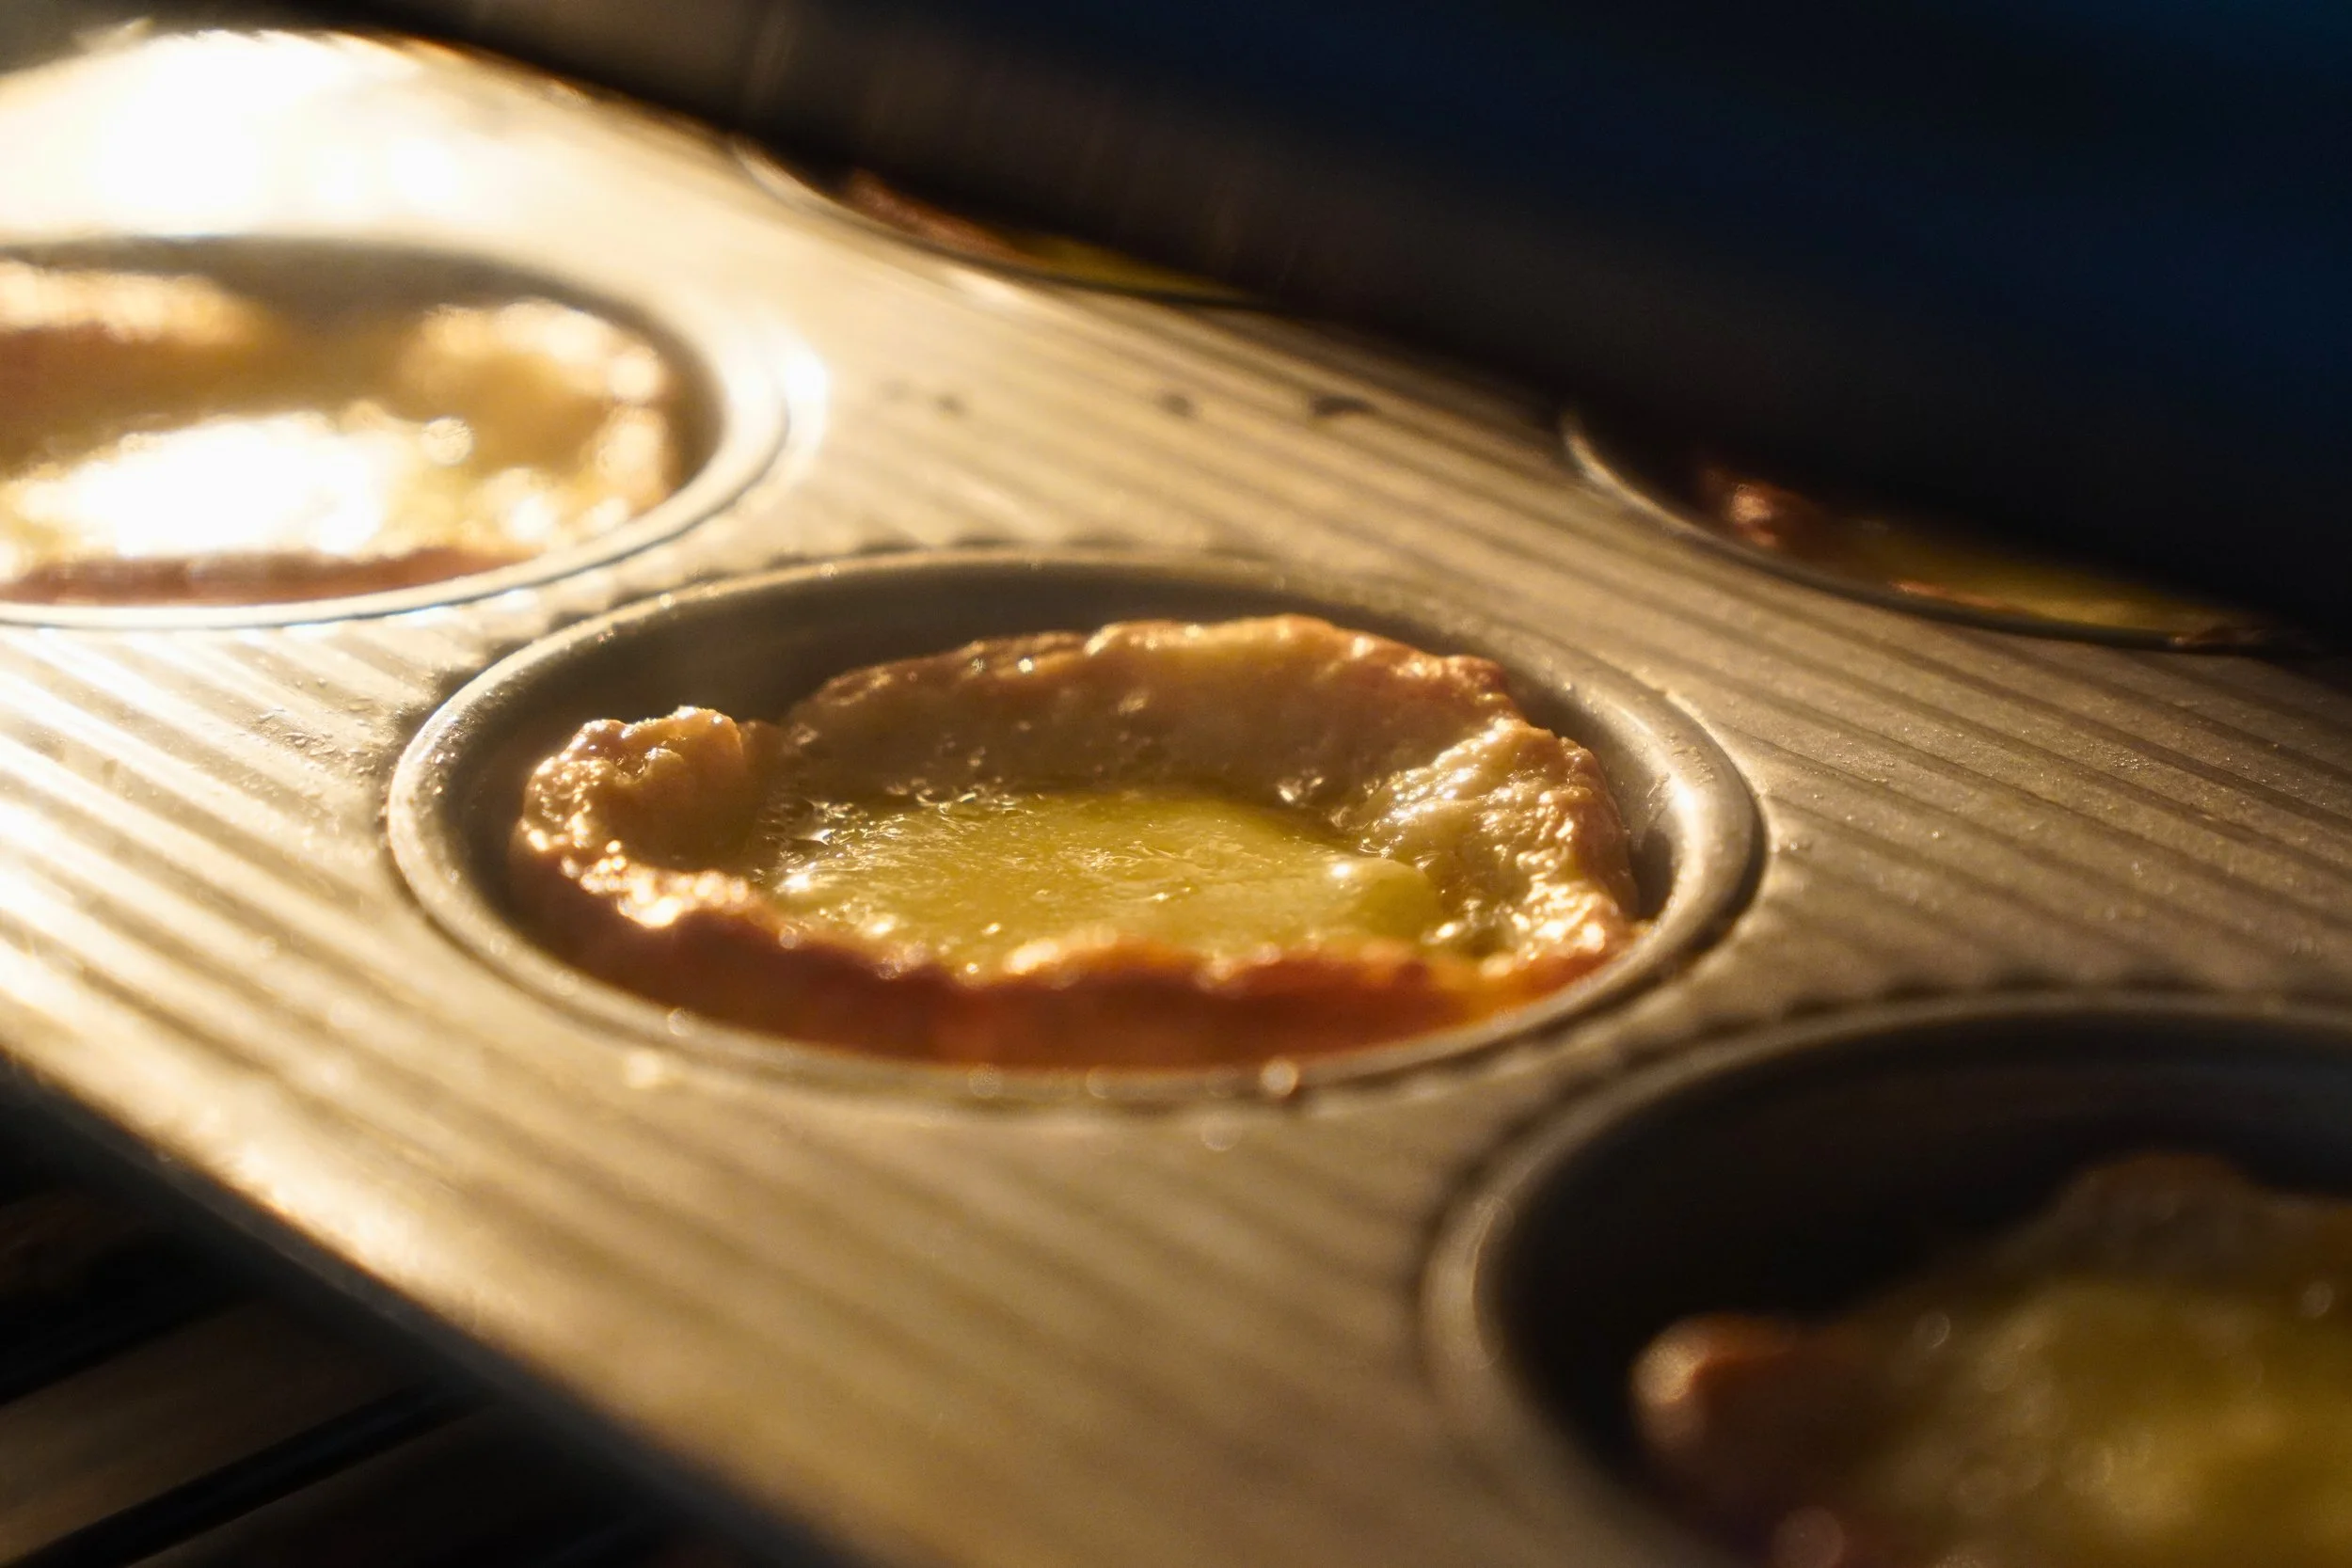
Leaving the tarts in the oven, switch to broil for 1–2 minutes until the tops develop burnished brown spots.Laila’s Tip: Keep a close eye — the pastry edges brown fast!
Repeat or store
Repeat with the second dough log, or wrap and refrigerate it to bake another day.Serve
Cool slightly and serve warm.
Optional: Dust with powdered sugar and cinnamon before serving.
🍽️ Serving: Best eaten the day they’re baked — ideally within 2–3 hours while still crisp and slightly warm. Can sit out for up to 8 hours uncovered (they’ll soften slightly, but still taste great).
❄️ Storage (cooked pastel): Cover lightly with plastic wrap or store in an airtight container at room temperature for up to 3 days. This keeps the pastry crisp without letting it dry out. To reheat, pop them into a 375°F (190°C) oven for 5–6 minutes until warm and lightly crisp again. (refrigeration not recommeneded as it will get soggy)
❄️ Storage (unbaked dough): Unbaked dough logs can be wrapped in plastic wrap and refrigerated for up to 3 days or frozen for up to 1 month. Thaw in the fridge and soften slightly before rolling.
Still have questions? Leave a comment below — or catch the step-by-step video on Instagram, TikTok, or YouTube.
Happy baking and sweet travels,
🌎 Laila from Baking Borders
Baking Borders is reader-supported. When you purchase through links on this site, I may earn an affiliate commission — at no extra cost to you. Learn more.